"Love is a temporary madness, it erupts like volcanoes and then subsides. And when it subsides you have to make a decision. You have to work out whether your roots have so entwined together that it is inconceivable that you should ever part. Because this is what love is. Love is not breathlessness, it is not excitement, it is not the promulgation of eternal passion. That is just being "in love" which any fool can do. Love itself is what is left over when being in love has burned away, and this is both an art and a fortunate accident. Those that truly love, have roots that grow towards each other underground, and when all the pretty blossom have fallen from their branches, they find that they are one tree and not two."
Louis de Bernieres
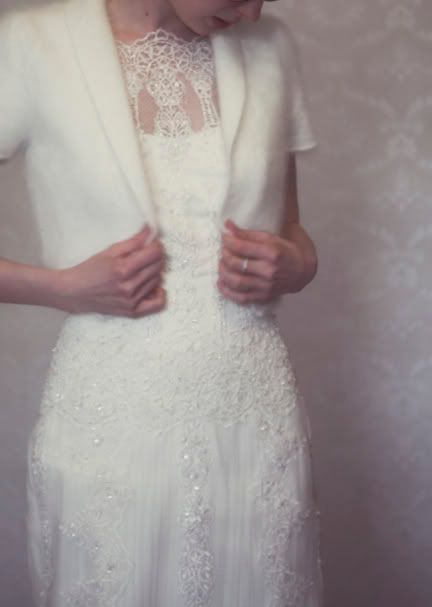
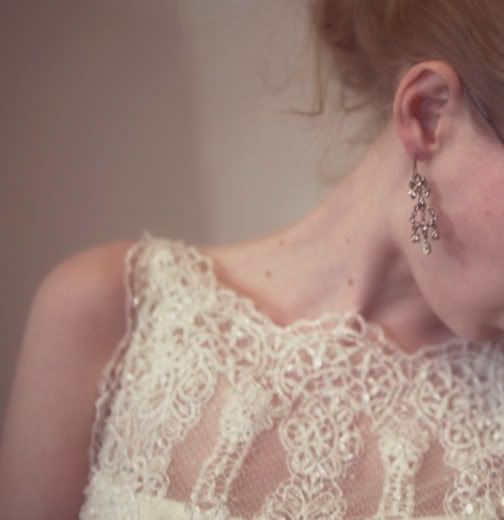
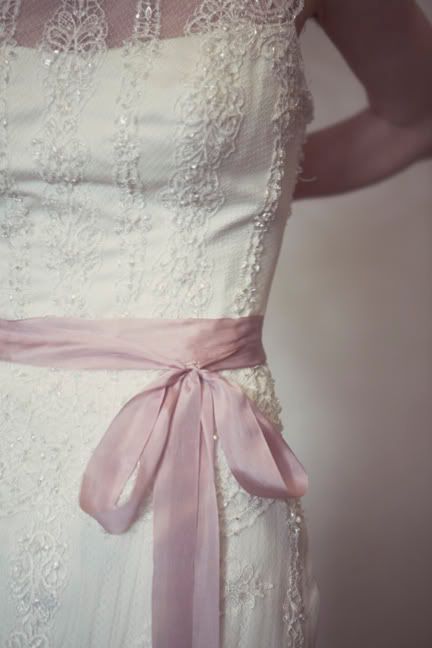
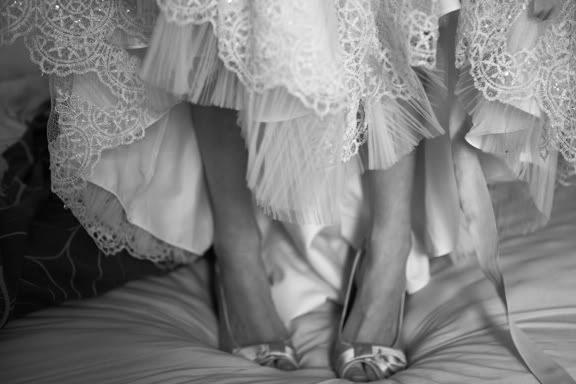
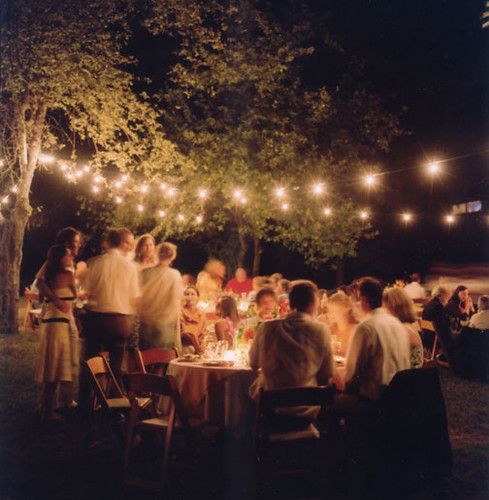
(Image courtesy of the WPJA. Please do leave a comment if you know which photographer it is by. Thanks! )
Monday, June 30, 2008
A Snippet of ceremony, 2 ...
Friday, June 27, 2008
The unmentionable invites, continued....
I thought these buggers would never be finished. I thought they existed merely to torture me, to drive me insane and render me incapable of any speech other than the constant and continuous muttering under my breath of swear words and sentiments like "If we call off the wedding we won't need invitations...'
But they are done and the have flown the nest (and not via the living room window), well most of them have, there are a few stubborn ones that just won't leave but I will deliver them by hand if I have to...

They are 5x5inch squares of recycled watercolour paper backed with Cabbages and Roses Cerise Hately fabric, which I am indecently in love with. I want to cover our house in it. The Boy isn't too keen on my penchant for floral fabric, but he likes this one. It's the perfect blend of romantic and modern.
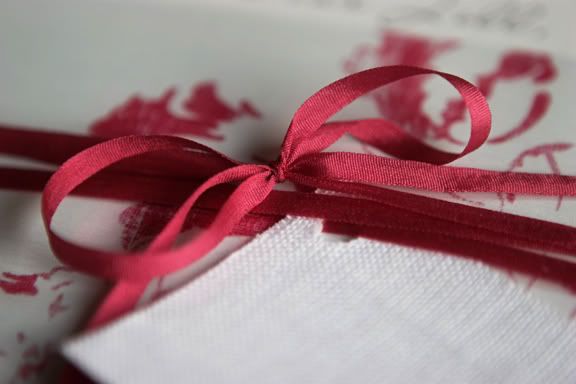
We got silk ribbon dyed to match the fabric (anal much?) by Cam Creations who are based in the US and were unbelievably helpful. Even with postage this was a sixth of the price of any in the UK. I love the internet. And ribbon.
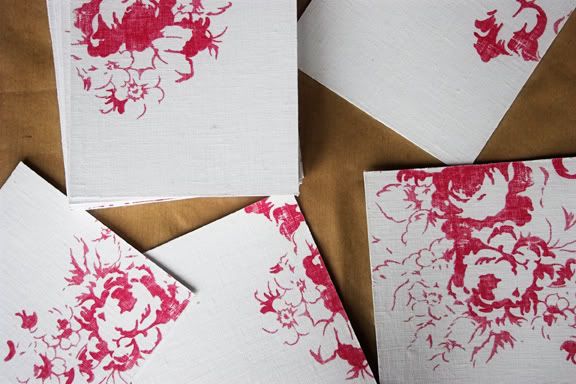
The print on the fabric was spaced out so much that it was impossible to get the same amount of print on each invite without wasting a tonne of fabric, so some have very little at all, but I like the variety.
The fabric is expensive so I bought it on ebay. And was sent a really bad fake. Which Cabbages and Roses replaced for me free of charge. Nice people, Cabbages and Roses.
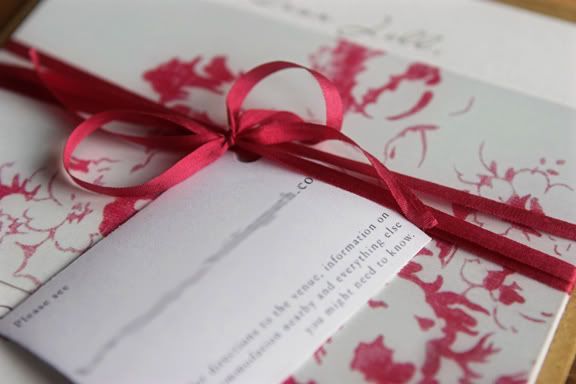
The little cards give the details of our wedding website where all of the usual 'invitation' information is. They were printed on recycled card and backed with white linen. Like our save the date cards.
The RSVP cards were finally, finally finished....

So there you are, the finished article. For all of you who are making your own invitations, keep the faith - you will finish them one day. Even if you think you will go mad trying. You might, but that's a small price to pay for the overwhelming satisfaction of putting them in the post box. And saying goodbye to them and hoping upon hope that you will never have to do it again. Even though you now know you can.
Oh and I still don't like glue.
Tuesday, June 24, 2008
Step by step. By step by step by step by step....
I've been putting this off as I'm truly dreadful at instructions, I'm rubbish at following them and hopeless at giving them; I'm of the 'left a bit, no I said left. Oh, well I meant right. Up a bit, no not like that, like this. What do you mean I'm not helping?' school of diy.
But, I promised and I firmly believe that craft should be a community thing, that when we make something we should share our methods with anyone who wants to know so that they don't go completely nuts trying to figure this shit out for themselves.
So here they are, my tips (they really aren't comprehensive enough to be called instructions) on making birds. I didn't really take many pictures of the process, not thinking that I would be called upon to explain the methods to my madness, but I've tried to illustrate my explanations where I can....
- Fabric, you don't need much, a piece about the size of an A4 sheet of paper should be enough for the actual birds. Of course you need about three times as much to account for all the bits that you will bugger up. Cotton or linen is much easier to work with than silk. I used dupion silk which didn't pucker like silk satin would but it did fray a lot and it was quite easy to pull the fabric.
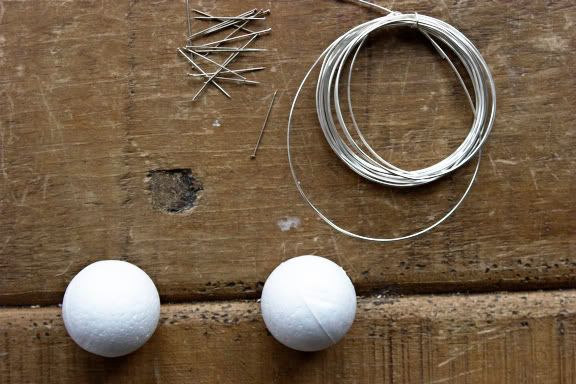
- A polystyrene ball, about 4cm across. To throw at anyone who offers 'helpful' suggestions.
- Wire, about 1mm thick. To poke said person.
- Dressmakers pins to hold everything together, including your sanity. I didn't have any when I made Norma Jean and I nearly lost my mind trying to hold the pieces together and sew them at the same time. If you're using white fabric be careful of old or cheap pins which are quite often tarnished and will leave marks on light coloured fabric.
- Feathers, if you want a feathery tail. Preferably from an ethical source.
- A kebab skewer or cocktail stick, painted or coloured whatever beak colour tickles your fancy. I've also heard of people using golf tees, but I don't like plastic. Or golf.
- An outfit of some sort or another which will be very handy in covering your mistakes. And the blood stains from where you prick your finger and don't notice until after you have smeared blood all over the expensive white silk that has taken three days to fashion into a bird shape.
- Stuffing. I used filter wool from The Boy's fishkeeping supplies as it's almost identical to the polyester stuffing you can buy for the purpose and he didn't want it.
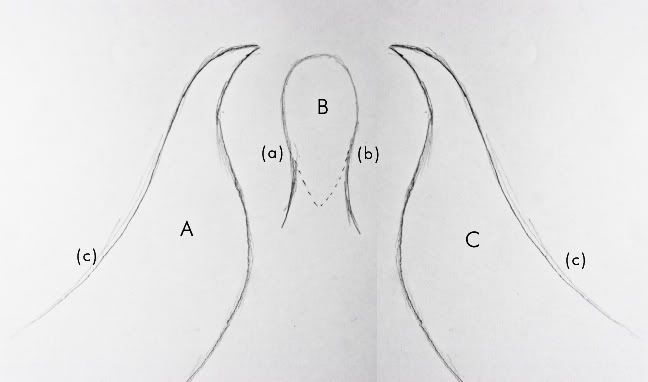
I'm really bad at working to a pattern, I tend to cut bits out then pin and tuck and fold until they are the right shape, but I did figure out some basic shapes that worked as a starting point -
Part B is the body and the dotted line marks the bit that is actually visible at the end, but I discovered that you need a lot of extra fabric to play with to get the right shape and to leave room for stuffing the bird.
Parts A and C are the sides of the bird, again the bottom half is little like the actual shape that is sewn but it was much easier to have extra.
Sew part A to part B first, up to point (a)
then part C to part A, up to point (b)
then finally parts A and C to each other, to point
(are you following this?!)
The point where the three pieces come together to make the top of the head was a right nightmare and required a lot of fiddling about to get it lying right.
Then stuff the top half of the bird with whatever stuffing you're using. Put the polystyrene ball in at the fattest part of the body then fold and tuck the three pieces of fabric until it all looks bird shaped, holding everything in place with the dressmakers pins. The ball will do all in its power not to stay in the bird. Hold the f*cker in with pins while you sew it all up. I left quite a few pins in the bird, holding part B to the polystyrene ball, they were all covered up with other bits of fabric or will be covered up when I put a dress on her. Pins are your friend while doing this project, use them liberally!
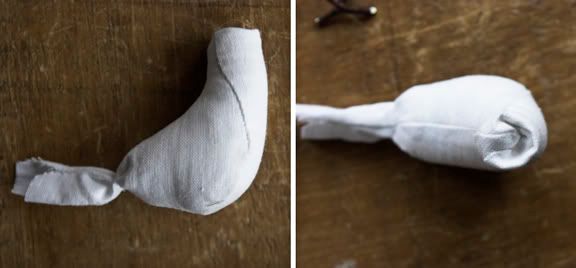
Remember to leave the end of the body open for a tail)
It is a good idea to figure out the placement of the eyes and beaks with pins first, pushing them in to make features and work out the spacing. They are a lot less permanent that thread or the hole that a beak will leave should you decide it's in the wrong place. And pins leave handy little holes as guides for where to sew.
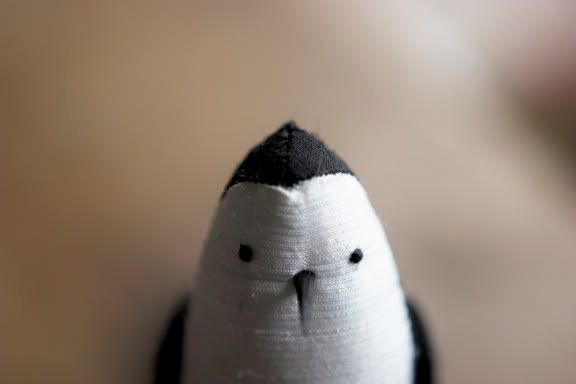
Poke a hole in the face with a pin and wiggle it about a bit before trying to put the beak in as it is very easy to pull the fabric while trying to get it in. We made our beaks with wooden kebab skewers, cut to about an inch long and whittled at both ends so they were easier to poke through the fabric, and coloured in with permanent marker. Make sure you leave it plenty of time to dry before putting it anywhere near your white fabric....
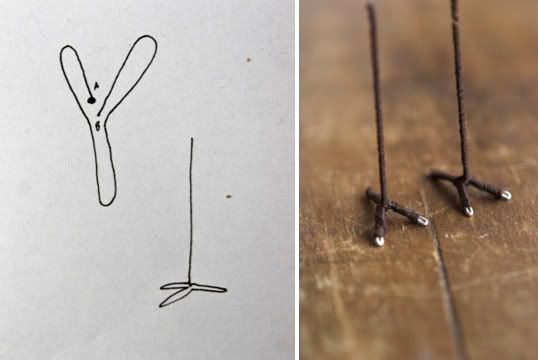
The wire was bent like this, starting at point A
...and at point B (my favourite part of this whole 'instructions' process is labelling!) the wire was bent straight up to make a leg, then cut them to the right length for your birdie, leaving about an inch to be put into the body.
We wrapped the legs in embroidery thread as I thought the wire was 'too shiny'. We tried wrapping them in thin black wire but it was 'too ugly'. I super glued down the tufty bits of thread at the top of the legs. Super glue dries faster than you might think. Pulling legs off your fingers is more painful than you might think. Just sayin....
Then we shoved them rather forcefully into the body, through the many layers of fabric and into the polystyrene ball. This bit was quite difficult and I bent the legs over and over again. Using a really big needle to make a hole before trying to get the legs in is a good idea, as is trimming the end of the wire into a sharp point with wire cutters.
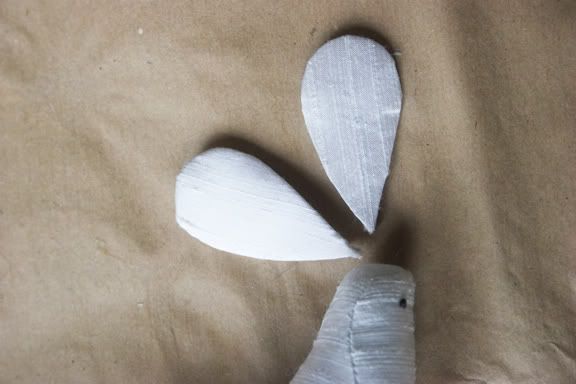
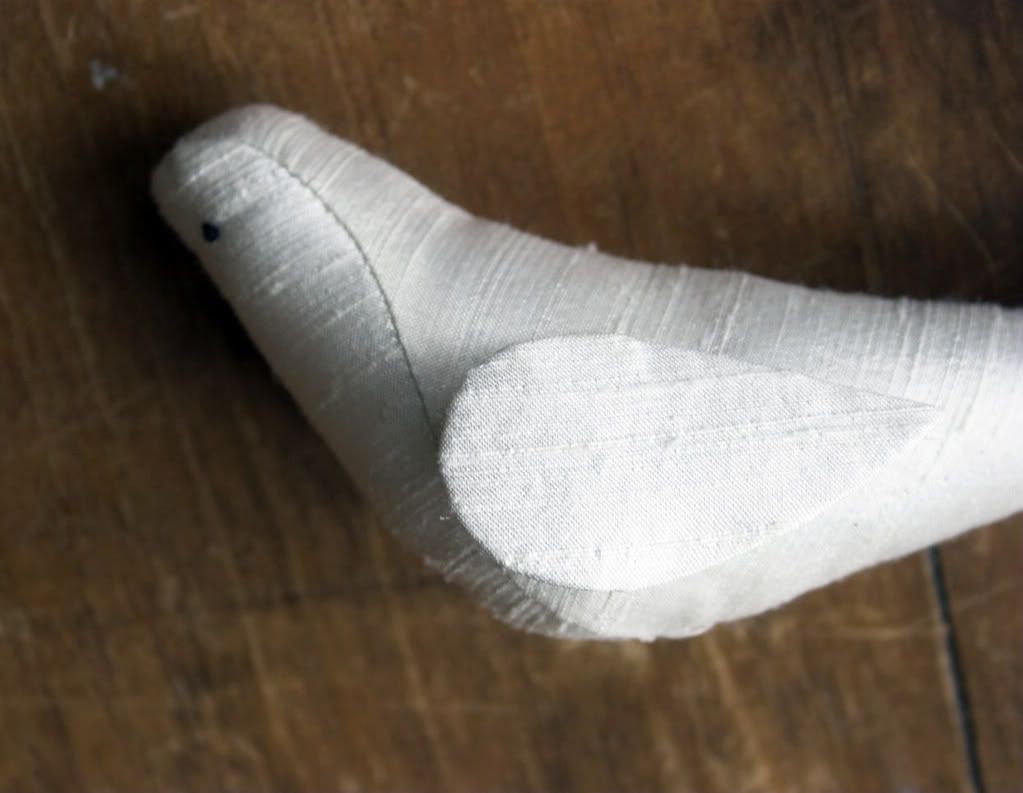
I made the wings by cutting out cardboard wing shapes, wrapping them in a very thin layer of stuffing (glued on) then wrapping them in fabric which I sewed together at the back, very messily.
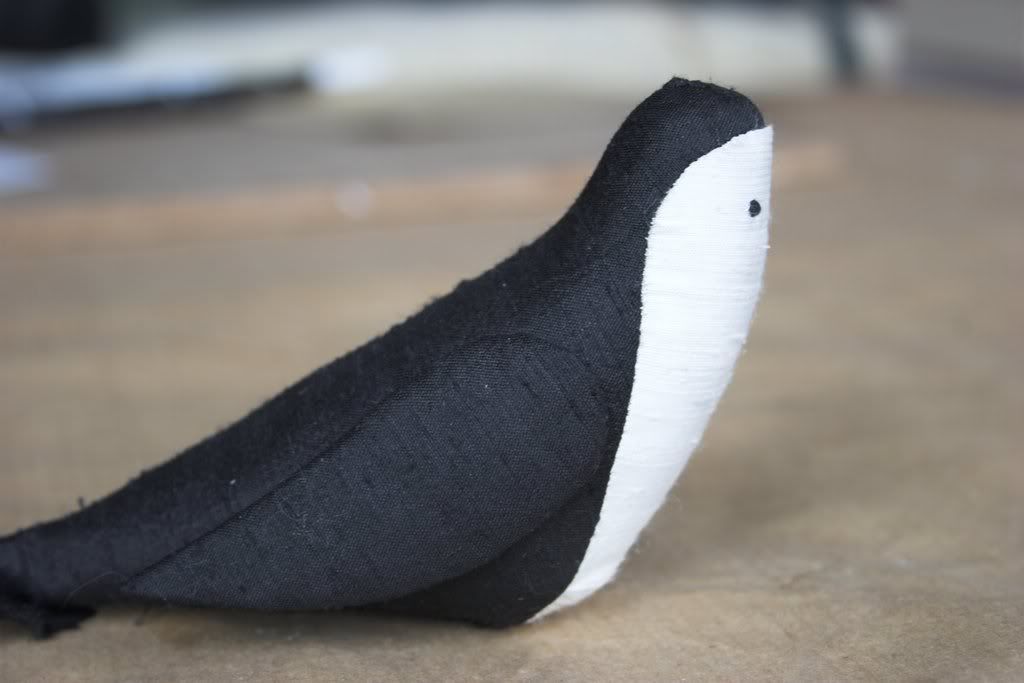
Then I sewed them in place with a few tiny stitches round the edges. You could of course use glue instead. Boy Bird's are done but Girl Bird's are waiting until after she is dressed. Boy Bird's are slightly bigger, at the request of The Boy....
You could also make tails in a similar fashion to the wings, with cardboard and fabric, if you didn't want to use feathers.
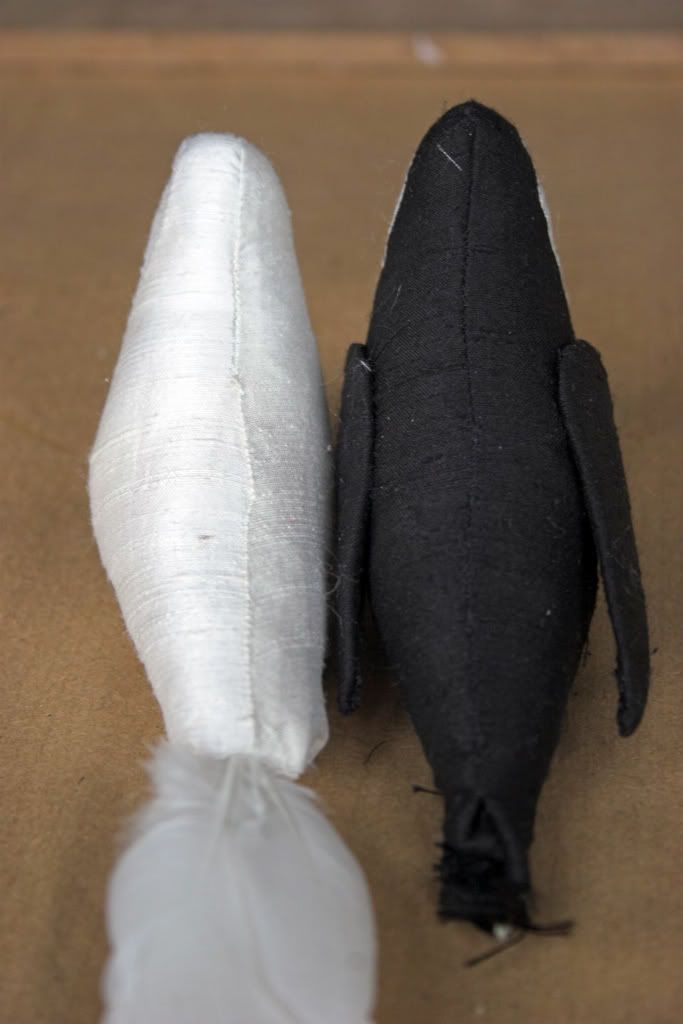
(You can see the hole left at the bottom of Boy Bird for the tail feathers. You can also see my dodgy sewing in the delightfully squint seam running down Girl Bird's back. That, along with the blood stain a couple of inches above her tail will be covered with the offcuts of my dress though. Phew)

He stands up all by himself. I was most surprised at this! But I think we're going to stick them to a little base to sit atop our stack of cupcakes on glass stands, just in case they fall over. Because they're not that stable.
Dressing.
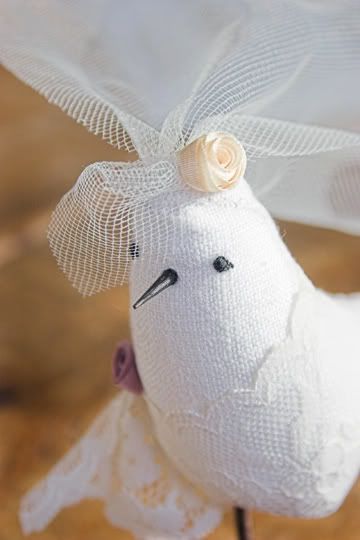
I think that's everything. You're on your own now. (I am only joking of course, if you have any questions please do ask and I'm um and ah a bit before telling you 'left a bit, no right a bit. Well I don't know, do I?' )
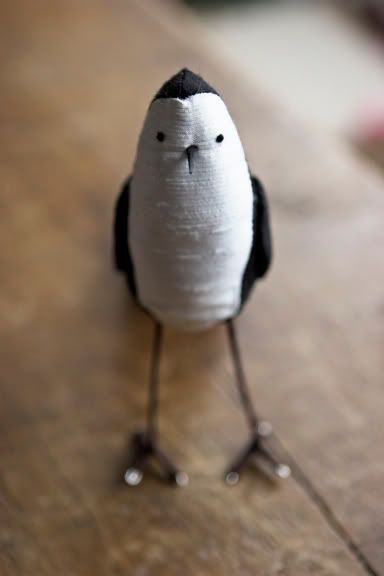
And there you have it. Not quite as chic and flawless as their $300 counterparts, but a damn site cheaper. I don't know how cheap, give me a moment.....
Black silk - free, I had bits lying around from a book I made The Boy for his last birthday
Ivory thread - £1.35
Roll of wire - £1.50
Brown embroidery thread - 80p
Stuffing - free, I pinched it from The Boy's fishkeeping supplies
Polystyrene balls - 22p each (x2)
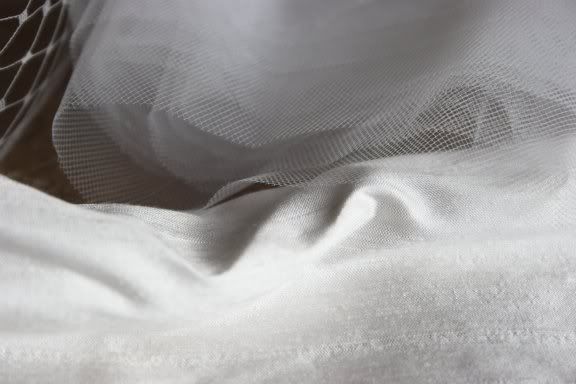
Veil tulle 10cm x 150cm - 90p
Pins - £1.99
Dress offcuts - free. Let's forget for a moment that the dress cost more than our last two cars combined.
feathers - £4.50
.......... Grand total - £15.48 for two birdies. Woohoo. It would be even cheaper if you use stuff that you already have, like fabric offcuts and if you don't buy wire, pins and thread especially. Quite the bargain I think!
Although I must add that the amount of time and frustration that goes into making these is ridiculous and I can totally understand that if you were going to do it for a living you would need to charge a hell of a lot more than £15 to make it worth the insanity it induces.
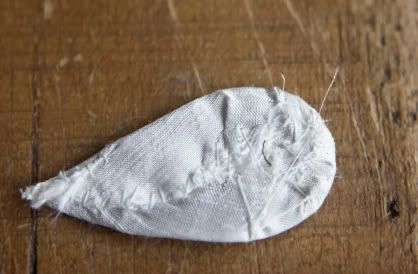
And just to prove that I really didn't have a clue what I was doing when I fist started, here is a picture of my second effort....
Sunday, June 22, 2008
Revelations
Thursday, June 19, 2008
40 pieces of heaven.....
Someone is selling 40 pressed glass cake stands on ebay at a starting price of £29.99. They are pick up only and situated 220miles away. If we had a car I would be in it and heading for 40 pieces of heaven.
I told The Boy and he looked at me like I was mad ''we don't need forty cake stands though''..... I responded with a very articulate and well thought through 'pfffff'.
Boys, they just don't get it. I think 40 more granny cake stands might be more than he could handle....
Wednesday, June 18, 2008
Ruffles
I don't know what has got into me, normally my taste in wedding dresses is extremely sleek, slinky and sexy (akin to a silk nightdress circa 1930) but at the moment I am really loving ruffles, lots and lots of ruffles. Weird.
Dress by Monique L'hullier, from Elegant Brides magazine and via Black*Eiffel.
Sunday, June 15, 2008
Peonies and polaroids....
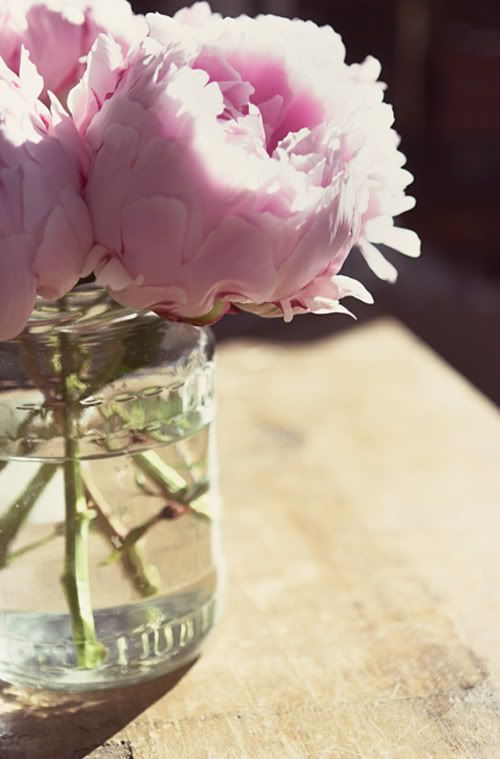
a little picture of the peonies my Gran gave me while we were visiting last week. I started playing with creating an sx70 effect of the photos but I'm not sure if I like it. If it had actually taken with a polaroid camera I would love it but I can't help but feel like it's just, well fake. And as I look at it I feel very distrustful of it. It has taken me a long time to accept digital photography at all, my true love is still black and white film photography and I desperately miss having a darkroom in our house. Spending hours alone under that one red lightbulb, the smell of chemicals on your hands and the world really and truly shut out, creating pictures as if by magic. No other photographers I know miss the darkroom, the hours spent trying to get one print right, the poisonous chemicals infiltrating your hair, staining your clothes, leaving your hands stinking for days. The frustration of the wasted paper, the hours and days you only realise you have lost when you emerge, blinking into the light. God I miss it. It's only the fact that I have an enormous pile of spools, some over three years old, sitting by my desk and waiting to be processed that has stopped me using my film camera recently. Oh how I miss my Pentax K1000, with it's one button, two switches and complete lack of digital anything. It took one tiny battery which has lasted over four years. It's light meter was a dial that moved manually. It had a beauty that my digital camera with it's 279 buttons, switches, options, lights, menus, auto-everythings will never have. It was a real camera.
So there you have it, some peonies and an attempt to recreate the beauty of - what I see as - real photography. An attempt that leaves me with an odd taste in my mouth.
Thursday, June 12, 2008
Progress Report....
We had a deadline. With the utmost seriousness we set ourselves the date of June 4th, by which we would be finished all wedding diy projects.
There wasn't a doubt in our minds that we would fail this task, we had us six whole weeks - of course that was enough time! Wars have been won in less (don't ask me which wars) and so help me I was going to win the war against glue that's too sticky and rulers that aren't straight enough.
Well needless to say that date has been and gone. And no, we are not finished our wedding diy projects and yes our earnest belief that we would now seems hilarious. Hilarious in that slightly desperate and hysterical manner where the only options are either to laugh or to tear your hair out. And as my hair is giving quite enough trouble as it is I have chosen to laugh.
I could list all of the things that we haven't done but that would make me cry, so instead I will update you on some of our more successful projects. None of which are actually finished since you ask.
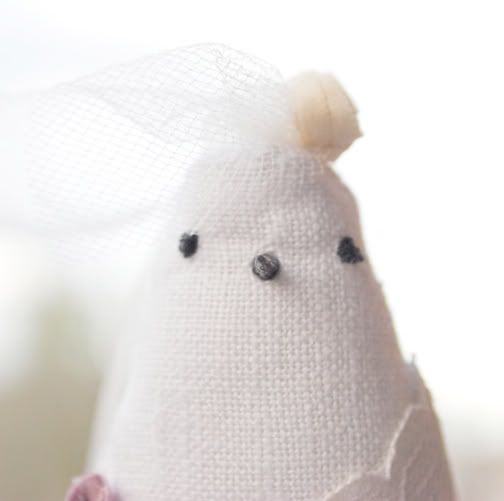
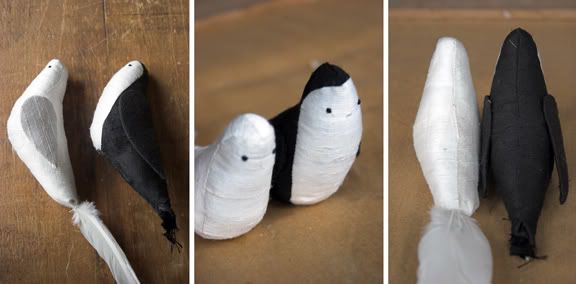
Well these are nearly finished. The Boy needs a tail and The Girl needs legs and a dress. And a veil. And they both need beaks. Ok, maybe they're not nearly finished.... Progress on the tail was made on our trip thanks to my chain smoking uncle who managed to find a significant number of black feathers without ever leaving the back step. How he acquired a handful of crow is a mystery. All I know is that every so often he would turn round, rollie in one hand and feather in another and mutter "this any use to you?". I decided not to question his methods as they were obviously working.
The dress has to wait until I have mine altered, as Girl Bird will be wearing the off cuts. I have been having worrying urges to take a pair of scissors to my dress in the name of getting this project finished. Must resist.
Here you can see the wings, which strangely are my proudest achievement. They were extremely satisfying to make, something about the combination of glue, scraps of cardboard, invisible stitching and tiny offcuts of fabric was very pleasing. Girl Bird's aren't stuck down yet as they will go over her dress. Obviously.
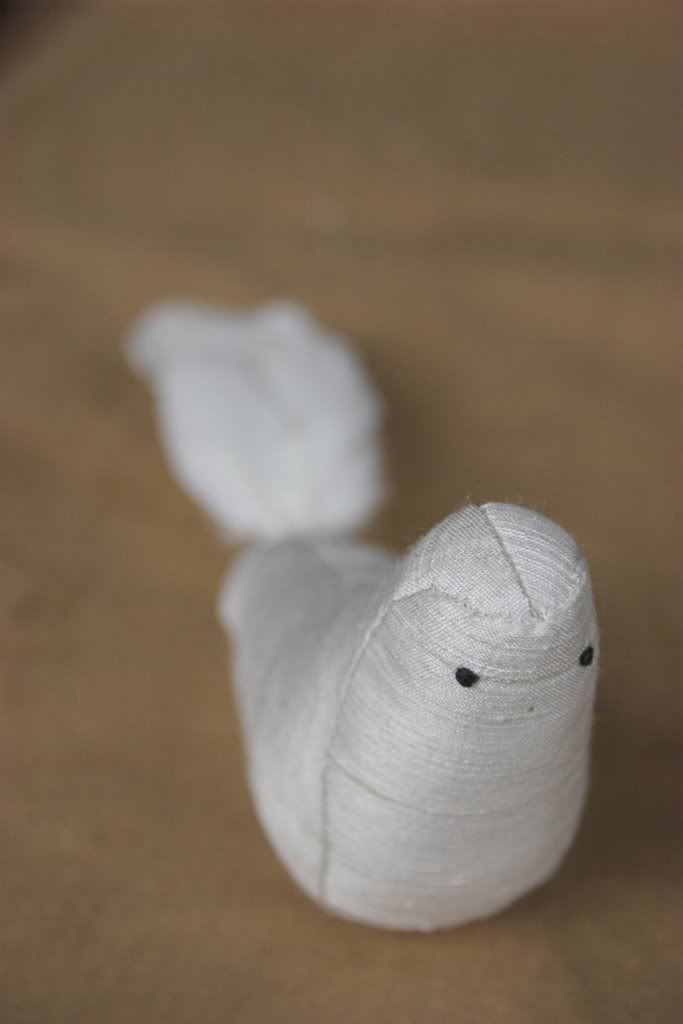
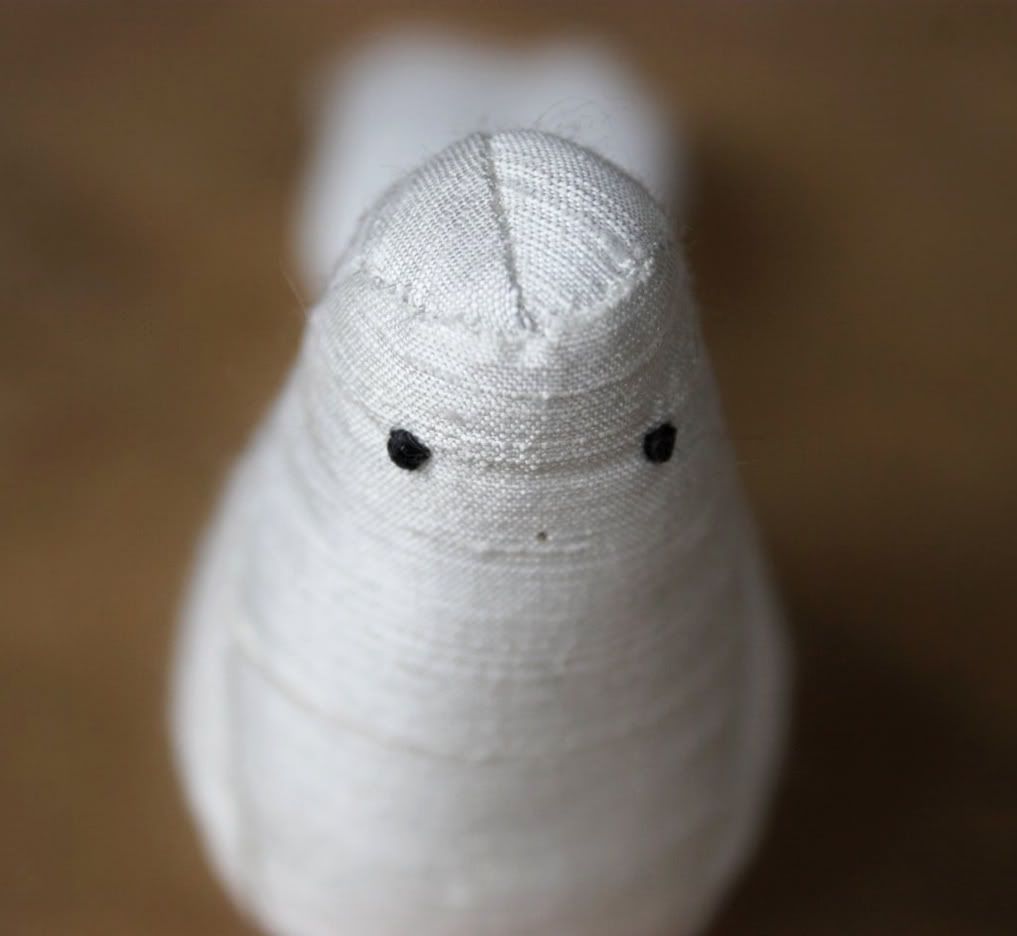
I started writing a step by step guide to how I made these, but it was really really boring. If anyone would like to know anything about them though please do leave a comment and I'll let you in on the secrets of an inept seamstress. God knows I could have done with some help when I started out on this project (my first bird looked like Casper the Friendly Ghost. The second had a concave skull.)
Here is my first attempt, although looking at it now is rather depressing as she's so much more 'finished' than these two. Whimper. That need to get things finished is all consuming at the moment. It follows me everywhere.
I was going to share our progress on the initiations too but photobucket is being an arse and all that rushing to get things done has worn me out. It appears that the need to finish things is rendering me incapable of finishing anything. The voice in my head that whispers 'hurry up, hurry up...' is laughing snidely.
Monday, June 09, 2008
Reasons I love him....
He hates Granny teacups. I love Granny tea cups. He smiles at me with love and laughs just a little when I bring home Granny tea cups...
Today we are visiting my favourite antique shop, in fact one of my favourite places, in the countryside near my Grandparent's house. A teacup in a perfect shade of green, a piece of linen with a hand embroidered trim, four silver forks with mother of pearl handles....These are some of my favourite finds. Oh what will it be this time?
Sunday, June 08, 2008
Saturday, June 07, 2008
The images.....
I thought I would share my favourites from the small collection of wedding photographs that I have been collecting over the last year. I love these as they really show the art form that wedding photography can be.
In terms of the different 'levels' of photography, wedding photography is thought to be pretty low by those who consider themselves 'art' photographers. It's true that traditional wedding photography can be truly awful; all that 'stand in a line, say sausages', soft focus crap, well yes that's a pretty embarrassing line of work to be in. But there are wedding photographers out there today who I would consider to be true artists, artists who work under immense pressure to capture a fleeting moment and turn it into an image that speaks volumes to someone who wasn't there.
Here as a few of my favourite images. I started collecting them a long time before I started taking notes on where they came from (bad blogger) so some of them are uncredited, for which I am most embarrassed. So if you know of the artist whose work they are, please do leave a comment and I will credit them as soon as I can.


